Thursday, August 31, 2023

Veggie Nuggets kid friendly


The preceding Veggie Nuggets are nutritious, suitable for children, and quick to prepare. Ideal for lunches and snacks.


Ingredients

1 cup shredded carrots

3 cups broccoli florets

1 garlic clove

2 eggs

1 1/4 cups seasoned breadcrumbs, divided

3/4 cup shredded cheddar cheese

1/2 teaspoon onion powder

1/2 teaspoon black pepper

1 tablespoon canola oil


Instructions

Carrots, shredded.

Microwave broccoli for two minutes, or until tender.

In a food processor, combine the shredded carrots, steamed broccoli, garlic, eggs, 1 cup of breadcrumbs, cheese, onion powder, and black pepper and pulse for 15 seconds, or until well combined. The mixture should quickly form into a ball. If it's too crumbly, add a teaspoon of water at a time until you reach the consistency you want. Form the mixture into tablespoon-sized balls (I use a cookie scoop). You should get approximately 25 nuggets. Flatten slightly into 1/2-inch-thick round discs.

In a shallow dish, place the remaining 1/4 cup breadcrumbs. Breadcrumbs coat each veggie nugget.

Heat the oil in a skillet over medium-high heat until it sizzles when sprinkled with water droplets.

Cook the nuggets in the skillet for about 4 minutes per side, or until golden brown and crispy. Depending on the size of your skillet, you may need to do this in 2-3 batches.

Serve with honey mustard sauce, ketchup, or your favorite dipping sauce.

Wednesday, August 30, 2023

Eclair Cake


This eclair cake is a no-bake dessert success with only 6 ingredients. This chocolate treat tastes exactly like a French bakery eclair but is far simpler to make. Aside from the chilling time, it takes less than 15 minutes to make just mix up the creamy filling, layer by layer it with graham crackers, and include it with velvety chocolate ganache, and you've got yourself a dessert!


6 c. Heavy whipping cream, divided

1 14-ounce can of sweetened condensed milk, divided

2 3.4-ounce boxes of instant vanilla pudding mix

2 tsp. vanilla bean paste

1 14.4-ounce box of graham crackers

8 oz. semisweet chocolate bars, finely chopped


In a big mixing bowl, whip two cups of heavy whipping cream with 1/3 cup of sweetened condensed milk on high speed till firm peaks form. Within a separate big mixing bowl, combine the pudding mix, three cups of cold heavy whipping cream, vanilla bean paste, and left-sweetened condensed milk. In three additions as you go fold the whipped cream into the pudding mixture.


Place a layer of graham crackers in a 13x9-inch glass baking dish, breaking up crackers when necessary to fill any gaps. Distribute half of the pudding mixture evenly over the graham crackers. Place an additional layer of graham crackers on top. Top with the rest of the pudding combination. Sprinkle with a final layer of graham crackers, cover, and chill for 30 minutes.

In a medium heatproof bowl, combine the chopped chocolate. Microwave the remainder of one cup of heavy cream in a large glass measuring cup or a different heatproof bowl until steaming, forty-five seconds to one minute. Pour the hot cream throughout the chocolate and set aside for 1 minute before mixing until smooth.


Smooth the ganache over the chilled cake with a spatula. If desired, create a swooping effect in the chocolate with a spoon. Refrigerate for at least four hours or an entire night till chilled and set up.

Tuesday, August 29, 2023

BROCCOLI STIR FRY


This straightforward Broccoli Stir Fry is ideal for lunch or dinner as a main course or as an additional meal. This dish is flavorful, thanks to the stir-fried vegetables and the finest stir-fry sauce!


FOR THE SAUCE

cup water

¼ cup low-sodium soy sauce

2 tablespoons honey

3 cloves garlic, minced

1 tablespoon minced fresh ginger

¼ teaspoon black pepper

2 teaspoons cornstarch

crushed red pepper flakes, to taste


FOR THE STIR FRY

2 tablespoons olive oil

1 pound broccoli, chopped into bite-sized florets

8 ounces cremini mushrooms, sliced

1 bell pepper, red, yellow

cooked white or brown rice, for serving

sesame seeds, optional


In a small mixing bowl, combine the following ingredients: water, soy sauce, honey, garlic, ginger, black pepper, cornstarch, and red pepper flakes. Combine to combine. Place to one side.

  In a large skillet over medium-high heat, heat the olive oil. After adding the broccoli and mushrooms, cook for 4 minutes, stirring frequently. If the pan gets too hot on medium-high, reduce the heat to medium. Continue to cook, stirring frequently, for two to three minutes till the vegetables are somewhat crisp-tender. To recombine the ingredients, whisk the sauce once more. Pour in the sauce and cook, stirring constantly, for 1 minute, or until the sauce thickens. Serve with cooked rice and sesame seeds, if wanted.

Sunday, August 27, 2023

Cauliflower Rice


 The following Cauliflower Rice Recipe makes an excellent low-carb, paleo, whole30, vegan/vegetarian main course for a meal. Furthermore, it's the ideal weeknight meal, taking only 20 minutes to prepare.


Ingredients

2 tbsp extra-virgin olive oil

1 stick celery sliced

½ cup onion chopped

1 big garlic clove minced

3 cups mushrooms sliced

14 oz. cauliflower rice

1/3 cup organic vegetable broth

Soy sauce to taste

2 cups spinach

Salt and black pepper to taste

1 tbsp fresh parsley chopped


In a food processor, pulse the cauliflower florets for about 25-30 seconds, or until they have the texture of rice. Place aside. Heat the olive oil in a large skillet over medium heat. Cook until the onions and celery become soft, about 5 minutes. Cook for 30 seconds after adding the garlic. Sauté the mushroom until it is cooked through. Combine the cauliflower rice, vegetable broth, and soy sauce in a mixing bowl. Give the cauliflower rice time to take in the vegetable broth for a few minutes. Cook until tender but not soupy. Cook for two minutes after adding the spinach. Season according to preference with salt and pepper. Before serving, garnish with fresh parsley. Have fun!

Saturday, August 26, 2023

cheese fries


 The following recipe for the most delicious easy cheese fries makes a super creamy sauce with Velveeta that is flawless for this beloved side dish!


4 cups frozen French fries  

1 tablespoon butter

1 tablespoon flour

1/2 cup half and half

3/4 cup cubed Velveeta


Cook the fries according to the package directions.

Make the cheese sauce while the fries are cooking: In a medium saucepan over medium heat, melt the butter. Put in the flour until thoroughly combined.

Bring the mixture to a boil after whisking in the half and half. Stir in the cheese until it is completely melted and creamy.


Arrange the fries on a platter or on individual plates. Pour the cheese sauce on top, and enjoy.

Friday, August 25, 2023

ROAST DUCK


 The following is an old-school, slow-roasted duck recipe. Roasting a duck in this manner results in crispy skin, much of the fat renders out, showering the root vegetables beneath, and the entire bird is cooked throughout.


INGREDIENTS

1 domesticated duck fresh or frozen

1 tablespoon kosher salt

1 lemon, cut in half

4 sprigs of sage, rosemary, parsley, or thyme


Preheat the oven to 325°F. Prick the skin of the duck all over with a needle or a sharp knife point, being careful not to pierce the meat itself. This allows the fat to render and helps crisp the skin. Take close attention to the back, flanks, and front of the breast. Rub the lemon slices all over the duck and insert them into the cavity. Season the bird generously and employ a little greater amount of salt than you think you need. Fill the herbs into the duck. Allow the bird to come to ambient temperature for about 30 minutes all while the oven warms up.

Whenever ready to roast, place the duck in an iron frying pan or another ovenproof pan, surrounded by root vegetables. Preheat the oven to 350°F. Remove any excess fat from the vegetables and season generously. Take away the vegetables if they are ready to eat. Remove excess fat with a spoon if there is a lot of it.

Raise the temperature to 450°F. When the oven reaches this temperature, return the bird to the oven for up to 30 minutes more, or until the skin is crisp. Take out the bird from the oven and set them aside to rest.


Thursday, August 24, 2023

Asian Glazed Drumsticks


These Asian-Glazed Chicken Drumsticks are savory and delicious, thanks to soy sauce, vinegar, and Sriracha hot sauce served over rice.


Ingredients

8 medium chicken drumsticks, skin removed

olive oil spray,

3/4 cup water

1 tbsp sriracha to taste

1/3 cup balsamic vinegar

1/3 cup low-sodium soy sauce

1 tbsp honey, or sugar

3 cloves garlic, crushed

1 tsp ginger, grated

2 tbsp chives or scallions, chopped

1 tsp sesame seeds


Brown the chicken in a heavy large saucepan for 3-4 minutes on high with some spray oil.

Cook on high until the liquid comes to a boil, then add the water, balsamic, soy sauce, honey, garlic, ginger, and hot sauce. Lower the heat to low and cover for about 20 minutes.

Take away the cover and increase the heat to high, allowing the sauce to reduce for 8-10 minutes, till it gets thick. At times turning the chicken. Maintain an eye on the glaze you don't want it to burn when it gets thick.

Place the chicken on a platter and drizzle with the sauce.

Serve with chives and sesame seeds on top.

Tuesday, August 22, 2023

PASTA PRIMAVERA


Pasta Primavera is a traditional Italian American dish loaded with spring vegetables. It has a light and fresh sauce and is a welcome change from heavier winter fare!


Pasta Primavera Recipe

Prepare your ingredients, chopping the vegetables and grating the cheese.

In a skillet over medium-high heat, combine the oil and butter.

When the pan is hot, add the vegetables, garlic, and sauté for about 5 minutes, stirring frequently until the vegetables are tender-crisp.

Combine the lemon juice, Italian seasoning, and basil in a mixing bowl.

Prior to draining the pasta, add a tablespoon or two of the pasta water to the pan. Drain the pasta and mix it in the pan. Stir in the parmesan cheese just before serving.

Monday, August 21, 2023

Chicken Tagine


Moroccan Chicken Tagine - Braised chicken in a rich spiced sauce adorned with chickpeas and dried apricots. For an authentic eating experience, serve over couscous.


1 cup dried apricot, halved

7 oz chicken thighs, bone-in skin-on

3/4 tsp salt

2 tbsp olive oil

1 onion cut into 0.3 cm/ 1/8" slices

2 garlic cloves, finely minced

1 cinnamon stick (sub 1/2 tsp powder)

14 oz crushed tomato

14 oz canned chickpeas, drained

1 tbsp preserved lemon skin, finely minced

2 1/2 cups chicken stock, low-sodium


SPICE BLEND

1 tsp cooking salt

3/4 tsp ground cumin

3/4 tsp ground ginger

3/4 tsp black pepper

1/2 tsp allspice powder

1/4 tsp cinnamon powder

1/4 tsp coriander powder

1/8 tsp clove powder

Plump apricots by soaking them in a bowl of boiling water for 30 minutes, then drain them.

Brown the chicken in a large, deep skillet over high heat. Heat the chicken in the skillet, skin side down, for 8 to 10 minutes, or until deep golden. Cook for 1 minute on the flesh side before transferring to a plate.

Toast aromatics and spices - Remove all but 2 tablespoons of the fat from the skillet. Turn the heat down to medium. Cook for 3 minutes after adding the onions. Cook for 1 minute after adding the garlic. Stir in spice blend for 30 seconds.

Stir in the cinnamon stick, tomato, chickpeas, plumped apricots, stock, and preserved lemon. Place the chicken skin side up on top.

5 minutes covered - Bring the liquid to a simmer, then cover with a lid. Cook for 5 minutes, adjusting the heat as needed to keep the liquid at a gentle simmer.

Simmer uncovered for 20 minutes, then remove the lid and cook for another 20 minutes.

Remove from the heat and set aside for 5 minutes before serving. Serve with couscous and fresh coriander on top.

Sunday, August 20, 2023

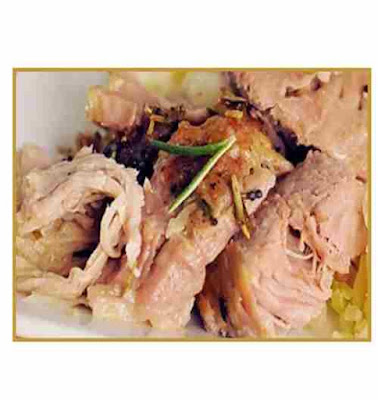
Easy Pork Roast


A tasty pork dish made from a simple and versatile roast. Great for a weekly dinner with family or for a special occasion.


Ingredients

1 pork tenderloin (1 to 1 1/4 lb)

2 teaspoons chopped fresh rosemary leaves.

½ teaspoon salt

½ teaspoon dried sage leaves, crushed

¼ teaspoon coarse ground black pepper

1 large dark-orange sweet potato peeled, cut into 1 1/2-inch pieces.

2 firm ripe small pears, unpeeled, each cut into 6 wedges

1 medium sweet onion (halved crosswise), cut into thin wedges

1 tablespoon olive oil

Fresh sage leaves if desired


Preheat the oven to 450°F. Coat a 15x10x1-inch baking pan with cooking spray. Position the pork tenderloin in the pan. Combine rosemary, salt, sage, and pepper in a small bowl. Rub half of the seasoning mixture onto the pork.

 Mix sweet potato, pears, and onion with oil in a medium bowl until evenly coated. Toss with the left seasoning mixture. Arrange vegetables around the pork. Cook for 25 to 30 minutes, mixing vegetables and pears carefully once or twice throughout baking, until pork has a slight pink blush in the middle and a meat thermometer inserted in the center reads 145°F, and vegetables are tender. Take out from oven and tent with foil. Allow to stand for 3 minutes. Pork should be cut into 1/2-inch slices. Serve alongside vegetables. Sprinkle with fresh sage leaves if you would like.

Saturday, August 19, 2023

Easy Vegan Salad


The Most Delicious Easy Vegan Salad is colorful, flavorful, and crunchy. The result incredible veggie salad that requires only 9 ingredients and is prepared in 10 minutes. 


Ingredients

2 cups spring salad mix

1 cup sliced cucumber

¼ cup julienned or ribboned carrot

1 cup cherry or grape tomatoes, halved

½ red onion, sliced

cup pepitas

1 avocado, sliced

Lemon juice

Olive oil

Toss salad mix, cucumber, carrot, tomatoes, and onion in a large mixing bowl.

Split the mixture between two bowls and top with pepitas as well as sliced avocado.

To taste, drizzle with lemon juice and olive oil, or top with your favorite salad dressing.

Friday, August 18, 2023

Low Sodium Meatloaf


The following traditional meatloaf recipe is low in sodium and packed with all of the delicious flavors that you know and love. It is made with everyday ingredients and takes about an hour to prepare. Meatloaf is one of those meals of comfort that seems to have existed forever. It's a classic dish that's filling, simple to prepare, and delicious!


INGREDIENTS

1 ½ lbs lean ground beef

¾ cup Panko breadcrumbs

½ cup no-salt-added ketchup, divided

1 ½ tablespoons dried parsley flakes

1 tablespoon onion powder

2 teaspoons dried oregano

1 teaspoon fresh ground black pepper

1 teaspoon garlic powder

1 large egg

Set the oven to 350°F.

In a big mixing bowl, combine all ingredients except 1/4 cup ketchup with your hands.

Form the meat mixture into a loaf and place it in a lightly greased baking pan. It is not required to touch the sides. A 9.5′′ x 5′′ loaf pan is ideal.

Roast for 45 minutes at 350°F. Cover the remaining ketchup onto the meatloaf and cook for an additional 15 minutes, for a total duration of 60 minutes.  

Thursday, August 17, 2023

Stuffed Artichokes


These Italian Stuffed Artichokes are a classic appetizer recipe, especially in the Spring, and are bursting with lemon and herb flavors. In addition, we're going to look at how to put together an artichoke. They can be tricky! In a nutshell, the perfect Stuffed Artichoke is mind-blowing. Every crevice is filled with the buttery-lemony-garlic bread crumb filling. And the artichoke leaves are the ideal vehicle for it. And this is how the Italians do things.

They become a tender and fun snack with a smooth and slightly nutty flavor once you know how to put them together and cook them.

The flower bud of the artichoke plant is the part we eat.

What appears to be 'leaves' on the bud are bracts. The outer bracts are green or dark purple, while the inner bracts are smaller and purple or white.

The choke is a swarm of pointy fibers at the base of the inner bracts that would become the artichoke flower if the bud was left on the plant.

The valued heart is located at the base of the choke, just above the stem.

That is the purpose of all the planning. When selecting artichokes, they should feel dense and heavy.

The leaves should be firm, bright, and packed tightly.

Remember that this is a flower bud, and the younger buds will be more tender.

A loosely backed artichoke, on the other hand, indicates that it is more mature, and your result will be tougher. You need to get past the spiny ends of the bracts before we start the artichokes.

Using a serrated knife, cut off the top quarter of the artichoke. This eliminates a large number of them. Cut the tips of each remaining leaf with kitchen scissors.

Then, remove the stem. Some individuals prefer to leave the stem on because it is edible. Yet, there is a level base for the stuffed version, which means you will cut the stem close to the bottom of the artichoke. Artichokes can be prepared at this point, softening the insides and making them simpler to remove, however, because we're going to be stuffing them, it's necessary to get inside and cut out the inner bracts and choke.

With a pairing knife or kitchen scissors, gently loosen the bracts and carefully remove the inner bracts. You'll notice a lot of fine fibers after removing the inner bracts. This is the choke, and it's necessary to remove as many of those tiny fibers as possible with a spoon. If there are a few survivors, it is not the end of the universe. The choke is edible, and it is simple to remove while eating your artichoke.

To keep the artichoke from turning grey, rub it with a lemon slice after cutting it.

This artichoke is now prepared for the stuffing.


Ingredients

Preparing the Artichokes

4 artichokes, firm and bright in color

1 lemon, juiced and zested, divided


For the Filling

1 ½ c breadcrumbs

¼ c + 2 Tbsp fresh parsley, chopped

¼ c + 2 Tbsp Asiago cheese, finely grated

4 garlic cloves, minced

2 tsp oregano

2 tsp basil

1 tsp ground black pepper

½ tsp salt

4 tsp olive oil

For the Bath

2 c water

1 c Pinot Grigio wine

Set the oven to 400 degrees Fahrenheit.

To make a level base, cut the top quarter of the artichoke and the stem off with a serrated knife. Snip the tips of each leaf to remove the sharp points. Open the bracts and slice out the innermost bracts with a sharp paring knife or scissors from the kitchen to reveal the fibrous choke. Scrape as much of the choke fibers out of the artichoke as you can with a spoon. Apply a little lemon juice on the cleaned artichokes to keep them from transforming grey while you get ready for the filling.

In a small mixing vessel, combine all of the filling components and 2 teaspoons of lemon zest until completely moistened. Spoon the mixture into the prepared artichokes' centers. Loosen the bracts and spoon a little filling between them. Set up the artichokes in an oven-safe baking dish. Cover the dish tightly with aluminum foil after adding the water, wine, and 2 tablespoons of lemon juice.

For 1 hour, bake the artichokes. Remove the aluminum foil after one hour and set your oven to broil. Broil the artichokes for 3-5 minutes, or until golden on top.

Remove from the oven and set aside for 5-10 minutes before serving.


Wednesday, August 16, 2023

Loaded Cheesy Pocket Tacos


Loaded Cheesy Pocket Tacos is a delectable fusion of traditional Mexican and American flavors, bringing the best of both worlds together in a delicious handheld delight. These tacos are an irresistible take on the classic taco, with each ingredient carefully chosen to create a perfect balance of both taste and texture. Ingredients:

1 packet of Taco Seasoning

1 pound ground beef

½ cup salsa

8 ounces of cream cheese, softened

2 tbsp melted butter

1 cup Cheddar Cheese, shredded

12 6-inch tortillas

Sour cream, salsa, green onions all toppings


Instructions:

Cook the ground beef in a skillet until it is thoroughly cooked.

Remove the skillet's grease.

Follow the package directions when adding the packet of Taco seasoning mix.

In a medium mixing bowl, smooth out the cream cheese.

Mix in the cup of salsa thoroughly.

Place a spoonful of cheese mixture in the center of a tortilla while holding it.

Cover the salsa and cheese mix with a spoonful of taco-flavored beef. Top with shredded cheese.

Gently fold the tortilla and filling in the same way you would a burrito.

Spray a baking sheet lightly with cooking spray.

Preheat the oven to 350 degrees Fahrenheit.

Set the rolled tortilla on a greased baking sheet.

Melted butter should be brushed over the tops of the tortilla rolls.

15 minutes in the oven.

Take away from the oven and top with your preferred toppings, such as lettuce, salsa, sour cream, olives, and more cheese.


Tuesday, August 15, 2023

Italian Pasta Salad


Italian pasta salad is a must-have summertime dish that is flavorful, nourishing, and simple to prepare. This pasta salad is nutritious, and tasty, and provides the energy you need to get through the day. It has pasta, vibrant vegetables, salami, mozzarella balls, olives, and fresh herbs. It's exactly what your summer picnics and cookouts require this year. What's the best part? It's effortless to make in advance and tastes better the next day!


 ½ lb. pasta, uncooked

3 oz. salami  

1 + ½ cup grape tomatoes  halved

½ green bell pepper chopped

½ red bell pepper chopped

¼ cup red onion, chopped

½ cup kalamata black olives, halved

4 oz. bocconcini mozzarella balls, halved

1 + ½ tablespoons fresh parsley, finely chopped

½ cup Italian dressing, homemade or store-bought

Parmesan cheese


A medium pot of salted water should be brought to a boil. Cook until the pasta is al dente, about 8-10 minutes, or according to package directions. To stop the cooking process and cool the pasta, drain, and rinse it under cold water. Place the pasta in a large mixing bowl or serving dish. If you are not assembling the salad right away, drizzle with olive oil and toss to keep the pasta from sticking together. Alternatively, combine the remaining ingredients. Toss the salad with the Italian salad dressing to incorporate. Serve immediately with Parmesan on top, or cover tightly with plastic wrap and place in the refrigerator for at least 2 hours. This will allow all of the flavors to blend. When ready to serve, toss the salad with a little more dressing, if aspired


Oregon Trail Bakery Review


I received some special shortbread cookies today, from the Oregon Trail Bakery. Located, in Salem, Oregon. The company is a great success story, starting from a cornerstone confectionery to now a wholesale baking company.


The cookies come in a box with a cover on them, that features sites from the beautiful state of Oregon. On the side is a wonderful story about the site, that you can read before you open your gift box of cookies.  


On the site of the Oregon Trail Bakery, you can find, an array of goodies they create. From cookies to pastries, they do it all.


Looking for a fresh start in 2018, Oregon Trail Bakery, turned to their forefathers who made the perilous journey along the Oregon Trail. They became motivated by their history and made some difficult choices. With a fresh new look at their products, they decided to start fresh with new ideas. Items that did not work for them were replaced with ones that would. And from there they carried out their new journey, with fresh delicious confectionaries.


The box that the cookies come in is just stunning with the sleeve around display of the stunning landscape of Oregon. It allows you to see the state, as you enjoy the confections inside.


All of Oregon Trail Bakery's confections are made only using local ingredients, that assure a tasty and fresh confection. From hazelnuts to other ingredients, they all come from Oregon local vendors.


My first box of cookies was Oregon Trail Bakery, a gift box of 36 yummy brown sugar shortbread cookies, everyone in their wrapper. This is a traditional shortbread cookie, that in every bite is a delicious butter flavor, and is so moist. You also get a hint of caramel flavor from the brown sugar. The sleeve of the box features the Crater Lake, with information about the lake as well. Cookies make a wonderful gift or take them out to display for a get-together. These delicious brown sugar shortbread cookies were made with pride, and you taste that in each bite you take. This is the first time I have ever tasted brown sugar shortbread cookies, and I was so happy I was given the chance. The Oregon Trail Bakery, brown sugar shortbread cookies are moist and very delicious. My family and I truly enjoyed them.


The second box from Oregon Trail Bakery, was their gift box, containing 36 Hazelnut shortbread cookies. The stunning sleeve on the gift box is of Multnomah Falls in Oregon. And knowing the fact that Oregon produces nearly all the hazelnuts grown in the United States, made the shortbread cookies even more special. The roasted, earthy notes of hazelnuts are added to the Hazelnut Shortbread, along with other ingredients making it a moist and delicious shortbread delight. It is a buttery confection with plenty of Hazelnuts to enjoy. The box from Oregon Trail Bakery, of Hazelnut shortbread cookies also makes a wonderful gift, or just to enjoy with your family and friends. Each box of these shortbread delights was tender, crumbly, and just melted in your mouth.


If you are searching for a confection of shortbread cookies or other delicious confections, you must try Oregon Trail Bakery. Their buttery, delicately sweet shortbread cookies are a dreamy treat.


You can find Oregon Trail Bakery online but also on Amazon.


www.oregontrailbakery.com


Disclaimer: Momzdailyscoops has personally reviewed the product listed above. Momzdailyscoops has not received any monetary compensation for her review. Momzdailyscoops did receive a free product to try out so Momzdailyscoops could evaluate and use it for her review. Momzdailyscoops thoughts & opinions in this review are unbiased & honest and your opinions may differ. Camera and lighting might affect the appearance of product/products.